

Google has introduced a feature to Android that prevents taking screenshots or recording the screen when sensitive information are present. Developers decide whether the information is sensitive or not. For instance, most banking apps restrict you from taking screenshots to prevent sharing sensitive information that would lead to stealing your credentials. When taking a screenshot of such information, a message saying “Can’t Take Screenshot Due to Security Policy” shows up.
Another popular example is taking a photo of a secure chat, whether it is on Telegram or Snapchat (the other party will be notified that a screenshot was taken). In this post, I will teach you how to bypass this security restriction and take screenshots of any restricted app or chat without notifying the other person.
We will be using scrcpy, which is a tool that allows controlling Android devices from a computer. The tool works on Linux, macOS and Windows, and it works over USB and TCP/IP. And most importantly, no root is required!
Installing scrcpy
Installing scrcpy is rather easy, with a single command you can have it ready. However, installing Android Debug Bridge (ADB) requires installing either Android Studio or the command line tools.
Install scrcpy on Mac
brew install android-platform-tools # install ADB
brew install scrcpy
Install scrcpy on Linux
apt-get install android-sdk-platform-tools
apt-get install scrcpy
Install scrcpy on Windows
All you need to do for Windows is download the SDK platform tools for Android, unzip the files and add them to the PATH environment. Thereafter, download the binaries for scrcpy and you’re set.
Accessing your device
scrcpy accesses the phone via the debugging interface, and which allows the tool to gain further rights. For this reason, we need to enable the Developer Mode and USB debugging.
Enable Developer Mode and USB Debugging
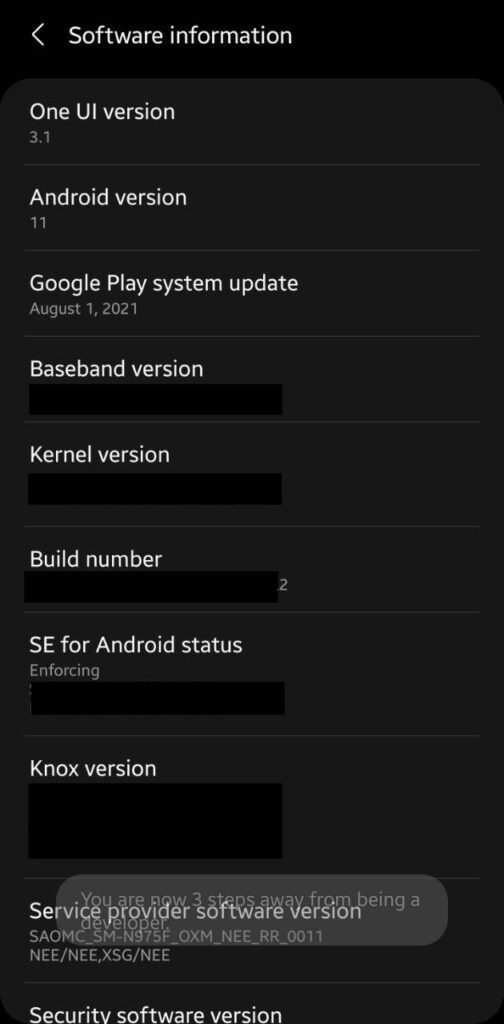
To enable USB debugging on your Android phone, head to Settings -> About -> Software information (this might vary a bit from device to device). Find the build number information and tap on it multiple times till a message shows up saying that the developer mode has been enabled.
Go back to the phone’s settings, and scroll to the end. Developer options should now be visible. Enter them and toggle the option for USB debugging on.
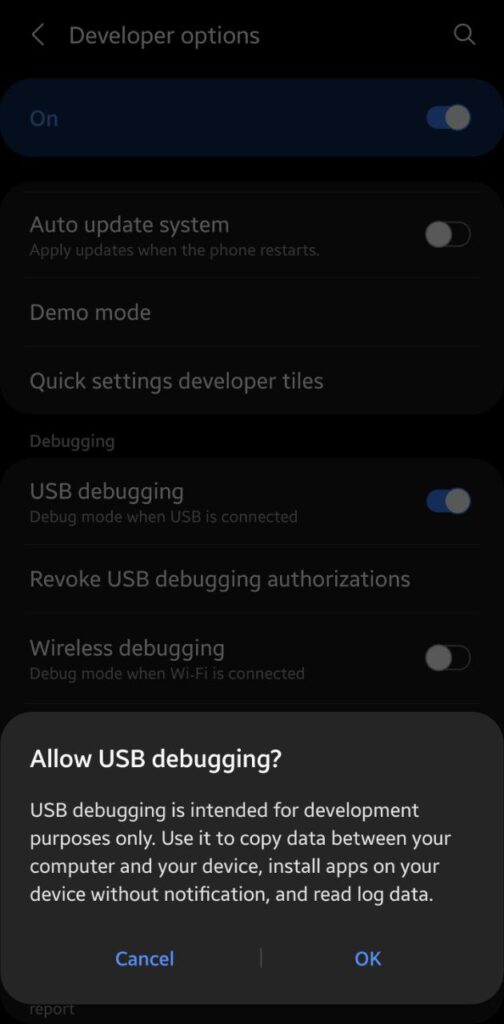
Now, your phone is ready to be connected to your computer. Plug it in to the computer via USB and allow the computer to access it from the prompt on the phone.
Taking screenshots
What’s remaining now is to run scrcpy. You can simply execute scrcpy in the terminal. If you wish to record the entire mirroring session, you can run the below command (where file.mp4 is the name of the output video):
scrcpy --record file.mp4
In case you got a warning that ADB is not verified by Apple, head to System Preferences -> Security & Privacy -> General and click on Always allow for ADB.
You will be prompted on the phone to grant the computer debugging access. Allow it and you should see your phone on your computer. You can now interact with your phone directly by using keyboard and mouse. To take screenshots, simply take a screenshot of the window.
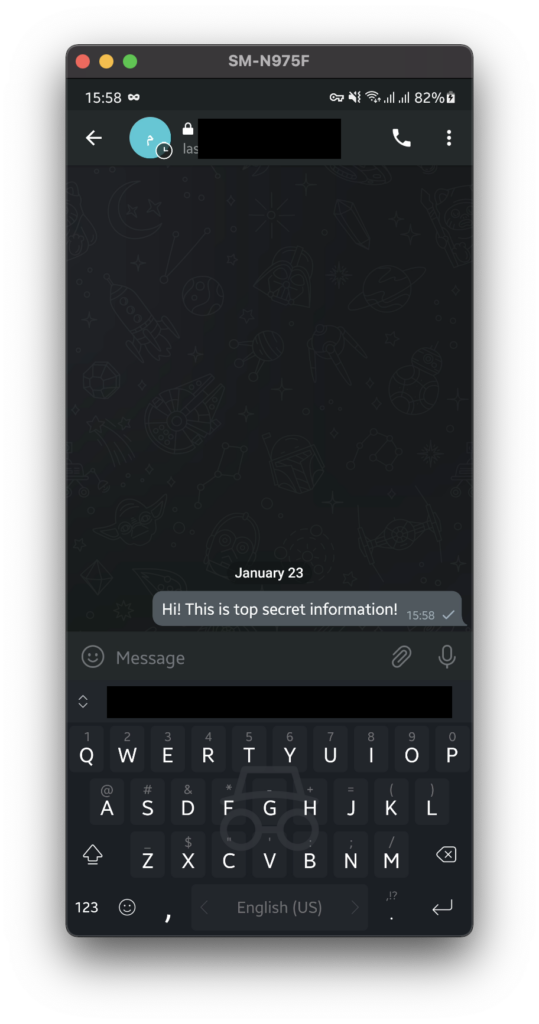
In conclusion, the security police enforced by apps is useful to protect you and your sensitive information. This tutorial demonstrates that it is possible to bypass such policies. Therefore, do not blindly trust in the such restrictions and do not share any personal information or pictures without verifying and trusting the other party in the opposite side of the communication. I hope this post was helpful to you.